The Midnight Sun

Category: Ubuntu

  • Replacing the Netspeed Widget on Kubuntu 22.04 and newer

    I have been using the Netspeed widget on my KDE Plasma installations for a long time to display the network download and upload speed in the Plasma panel. When I upgraded to Kubuntu 22.04 a few months ago, I found that it stopped working. After doing some research, I found that the KSysGuard package that the widget depends on has been removed from the Debian and Ubuntu repositories as it is unmaintained (Debian bug).

    Thanks to a useful suggestion on Reddit, I was able to recreate the functionality of this widget using the System Monitor Sensor widget. Here is what I did to achieve it.

    • Add the System Monitor Sensor widget to the panel.
    • Right-click the widget and click on the Configure System Monitor Sensor option in the menu
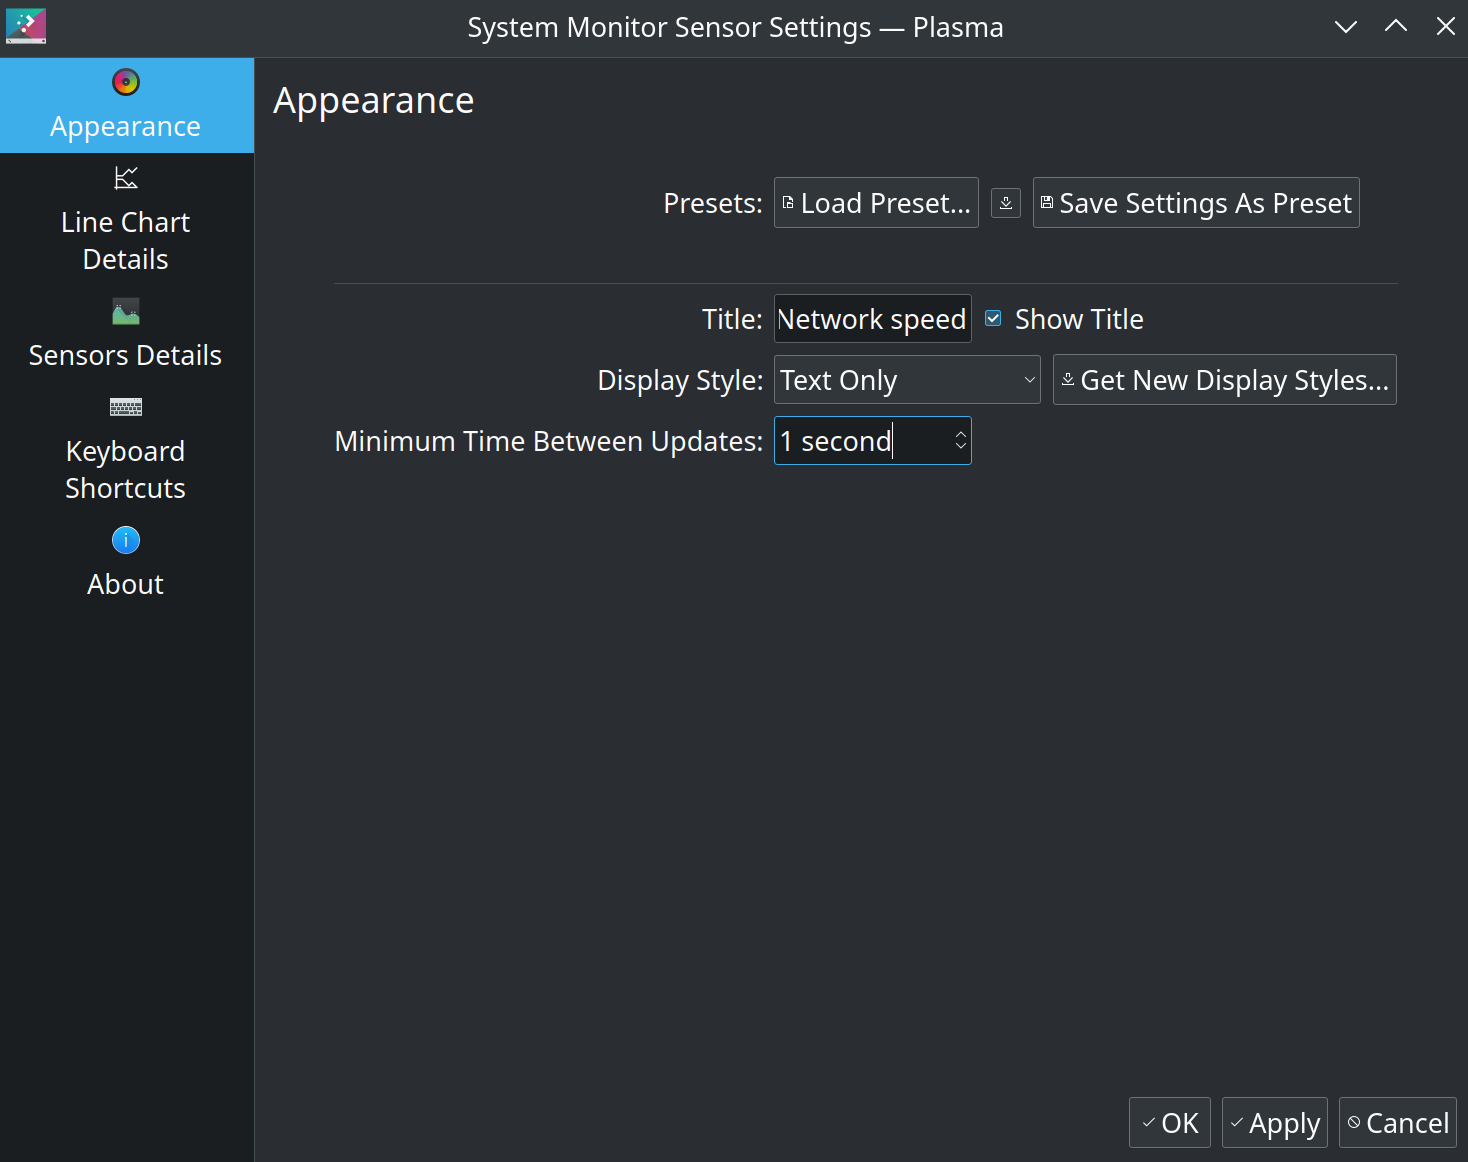
    • In the Appearance tab, load the Network speed preset, set the Display style to Text Only and set the Minimum Time Between Updates to 1 second. Apply the changes before proceeding to the next step.System Monitor Sensor widget appearance tab settings
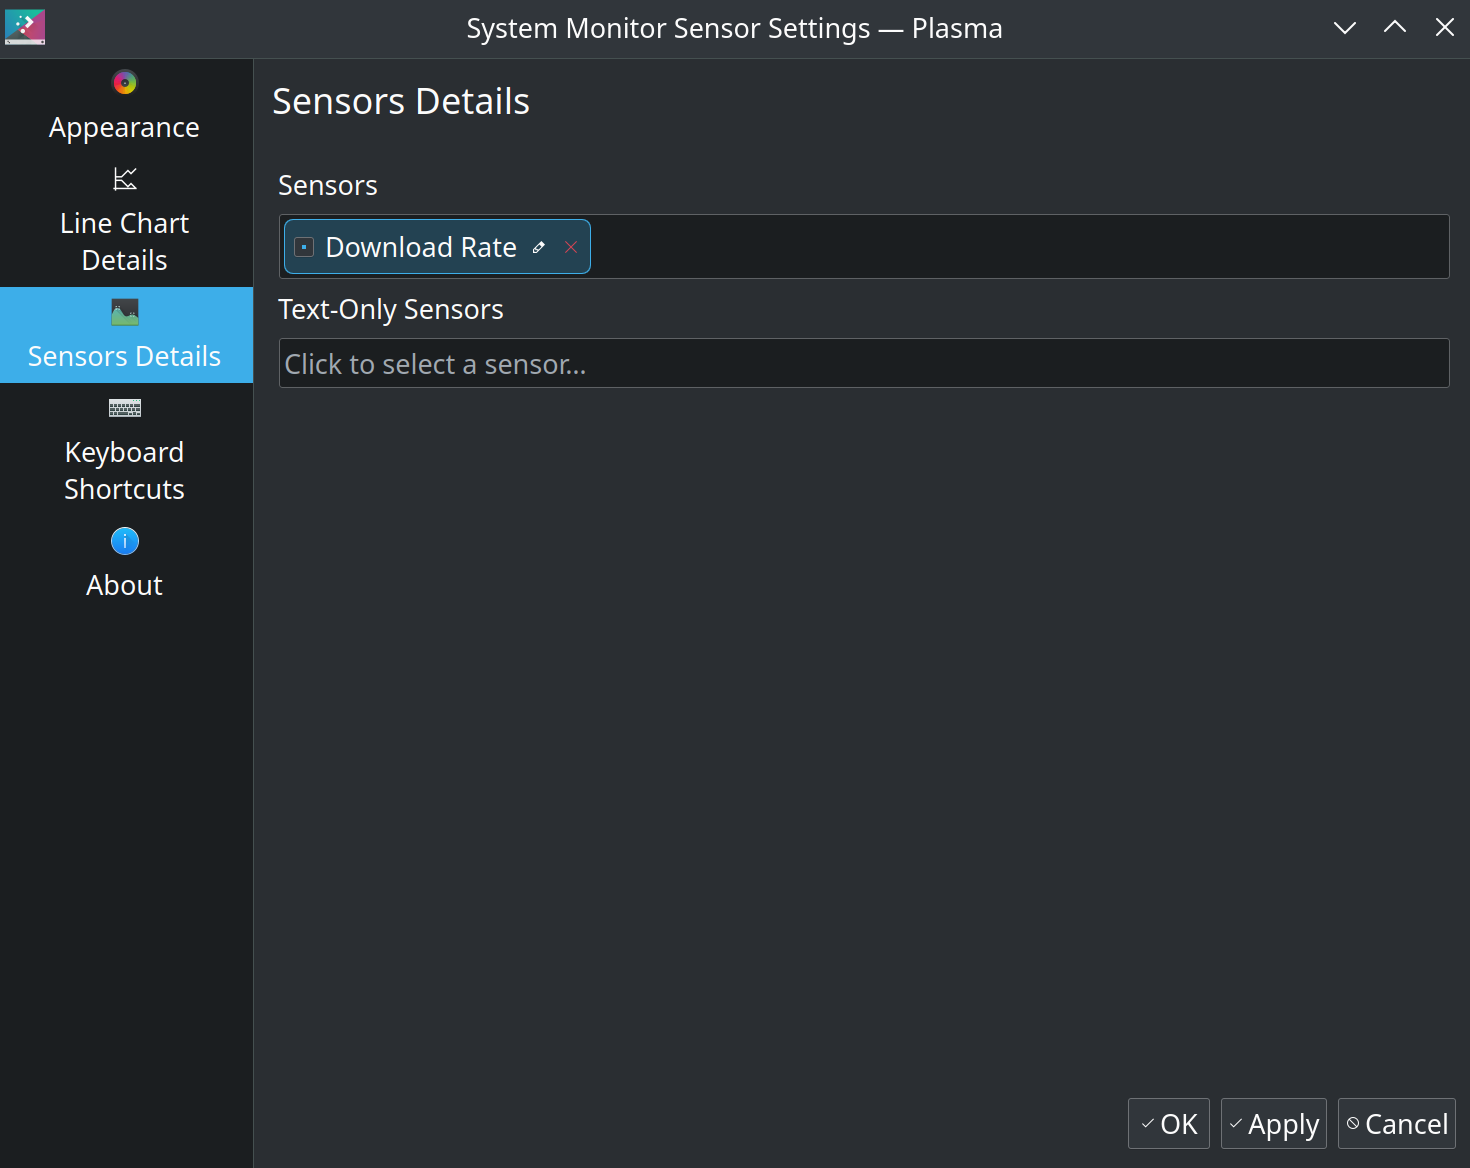
    • Open the Sensors Details tab and in the Text Only Sensors field, search for the Download Rate sensor. I chose the Download Rate (B/s) version. There is also a Download Rate (b/s) sensor, if you prefer that.System Monitor Sensor widget Sensors Details tab
    • Click on the small pencil icon edit button just after the name of the widget, Download Rate, to edit it. Specify the down arrow symbol, ↓, as the name. Apply the changes.
    • Now you have a widget that shows the current download speed on the panel, updated once every second.
    • Add another System Monitor Sensor widget to the panel and configure it to display the Upload Rate by following the steps above, tweaked for displaying the upload rate.
    • The result of doing these steps should look like what is shown in the screenshot below.Download and upload speed widgets on the Plasma panel

    With this, I have a good replacement for the NetSpeed Widget on my Kubuntu install.

    January 19, 2023
  • Ubuntu 22.04 desktop installation guide btrfs-luks full disk encryption including /boot

    I am a big fan of Willi Mutschler‘s btrfs-luks full disk encryption installation guides on his site, https://mutschler.dev, and have used them for installing Manjaro and Ubuntu 20.04 and newer versions. Recently, I set up Kubuntu 22.04 full disk encryption by following the same guide and noticed a couple of changes that had to be done to get it working. So I am documenting those here till he writes a new guide for Ubuntu 22.04. 🙂

    In the step 3 of his excellent guide, the optimized mount options for SSD and NVMe drives are listed. The space_cache option mentioned in that section no longer works on Ubuntu 22.04 because the option has been renamed in the newer versions of the Linux kernel. So one has to specify the option as space_cache=v2. Otherwise, the Ubiquity installer will crash, and the installation will fail.

    Also, in the Install the EFI bootloader section, it is a good idea to use the HWE Linux kernel package names corresponding to 22.04 instead of 20.04 since the packages containing the old LTS version in their name are ‘dummy transitional packages’. So the corresponding command can to be updated to

    apt install -y --reinstall grub-efi-amd64-signed linux-generic linux-headers-generic linux-generic-hwe-22.04 linux-headers-generic-hwe-22.04

    At the time of writing this post, the HWE package installs the same kernel version as the one that shipped with Ubuntu 22.04 since there isn’t a newer kernel released yet – these are usually backported from newer LTS versions.

    With these minor changes, it should be possible to follow the steps in that documentation to set up full disk encryption with btrfs and luks on Ubuntu 22.04.

    As a bonus, I have used the same guide for installing Kubuntu 20.04, 21.10 and 22.04, with appropriate substitutions, wherever needed.

    I have usually skipped the last section in this guide, Install Timeshift, timeshift-autosnap-apt and grub-btrfs, in favour of using my tools of choice to do the same – Snapper and snapper-gui, both of which are available in the official Ubuntu repositories. I will write a blog post about it in the future. 🤞

    January 18, 2023
  • Setting up Synergy 1.8.8 with SSL on OS X El Capitan as the server and Ubuntu 16.04 as the client

    Update (May 2020): Use Barrier, which is a maintained fork of Synergy that supports SSL by default and has builds for Windows, macOS and Linux.

    Synergy is a free and open source software (licensed under GPLv2) for sharing one keyboard and mouse between multiple computers. The source is hosted here on GitHub and the Synergy website provides compiled, installable releases with support for SSL encryption for a fee.

    At work, I have a Macbook Pro laptop running OS X El Capitan and an Ubuntu 16.04 desktop connected to a monitor which I use daily. Working on two separate computers at the same time is laborious and thanks to Hiemanshu, I came to know about Synergy.

    Eager to try it out, I built it from source after patching (to use the Qt installed on my Macbook using Macports) and with minimal configuration, I was able to get it to work. But since my computers were connected to the corporate network, I did not want my keystrokes to be sent through the network in plaintext. So till today, I used an SSH tunnel between my Macbook acting as the server and the Ubuntu desktop acting as a client. It was a little bit inconvenient having to setup the SSH tunnels every time and I didn’t want to use something like autossh.

    Imho, in the post-Snowden era, any software sending sensitive plaintext data through the network is broken by design. Since Synergy is free software, I was hoping to patch it to allow SSL communication without requiring a license. With some help from the comments and pull requests on the Synergy GitHub repository and some additional tweaking, I was able to build Synergy 1.8.8 with support for SSL irrespective of the licensing status.

    The following details of how I managed to do it are primarily for my reference and I am sharing it on my blog in the hope that it might be useful for others as well. That said, Synergy is a very useful free/libre software and I recommend purchasing a license to support the development. One of the Synergy developers has committed to enable SSL communication by default in the 2.0 version.

    Steps to be followed on OS X El Capitan

    • Clone the Synergy GitHub repository from  and checkout the 1.8.8-stable branch
    • Apply this patch to fix the Qt related paths and also to enable SSL without license check. For Qt installed without using Macports, tweak the frameworkRootDir variable in the patch to point to the correct directory. Also tweak the path to the Info.plist to point to a valid path.
    • If the Mac OS X 10.11 SDK is not present under the /Applications/Xcode.app/Contents/Developer/Platforms/MacOSX.platform/Developer/SDKs directory, Download it from this GitHub repository and copy it to that directory.
    • Install the dependencies of Synergy (cmake, qt5) using Macports.
    • Navigate to the top-level directory of the repository and run ./hm.sh conf -g2 --mac-sdk 10.12 --mac-identity ElCapitan where the current OS is El Capitan and the available default Mac OS X SDK is 10.12. Modify the parameters based on the available SDKs and the OS version.
    • After the previous command completes without errors, run ./hm.sh build to start the build process.
    • To create a Mac app, run ./hm.sh dist mac.
    • The Synergy.app is available under bin/Release/Synergy directory. Drag and drop it to the /Applications directory.
    • Create the SSL certificate needed by the Synergy server by running the following commands
      mkdir -p ~/.synergy/SSL/Fingerprints
      openssl req -x509 -nodes -days 365 -subj /CN=Synergy -newkey rsa:1024 -keyout ~/.synergy/SSL/Synergy.pem -out ~/.synergy/SSL/Synergy.pem
      openssl x509 -fingerprint -sha1 -noout -in ~/.synergy/SSL/Synergy.pem > ~/.synergy/SSL/Fingerprints/Local.txt
      mkdir -p ~/Library/Synergy/SSL/.
      cp ~/.synergy/SSL/Synergy.pem ~/Library/Synergy/SSL/.
      sed -e "s/.*=//" -i ~/.synergy/SSL/Fingerprints/Local.txt
      
    • Enable Accessibility permissions for the Synergy app from the Security and Privacy dialog under System Preferences.
    • Start the Synergy app and run it as a server. The app window should indicate that SSL is turned on and the logs should not have any errors.

    Steps to be followed on Ubuntu 16.04

    • Clone the Synergy GitHub repository from  and checkout the 1.8.8-stable branch.
    • Apply this patch to fix the Qt related paths (not needed on Ubuntu) and also to enable SSL without license check.
    • Install the dependencies by running the following command
      sudo apt-get install cmake make g++ xorg-dev libqt4-dev libcurl4-openssl-dev libavahi-compat-libdnssd-dev libssl-dev libx11-dev
      
    • Navigate to the top-level synergy repository directory and run
      ./hm.sh conf -g1; ./hm.sh build; ./hm.sh; ./hm package deb
      

      This builds Synergy and creates a .deb package file under the bin directory.

    • Install the .deb file using dpkg.
    • Start the Synergy app from the Unity launcher (or alternatively using its full path).
    • Configure it as a client and set the server address to that of the computer running the server.
    • The app will display the server’s certificate fingerprint with a prompt to trust or reject it. Trust the fingerprint after carefully verifying it. If there are any errors with the server fingerprint or trusting it, copy the Local.txt file generated on the server and save it under ~/.synergy/SSL/Fingerprints and restart the client.

    References:

    • https://github.com/symless/synergy/wiki/Compiling
    • https://github.com/symless/synergy/wiki/Security
    • https://github.com/symless/synergy/wiki/User-Guide
    July 14, 2017
  • Moving away from Ubuntu after 5 years

    Ubuntu’s Amazon search “feature” fiasco (Probably I have enough in my mind to write another big post) was the last thread in the straw for me. Switched to Debian Testing with GNOME 3. Surprisingly, GNOME 3 isn’t that bad at all and not much different from Unity. Yeah having to install extensions to achieve some functionality expected to be out of the box, is a bit weird, but is something you can live with.

    One thing that isn’t quite up to the mark is the notifications system. Most of the commonly used applications in Ubuntu, like Pidgin, Thunderbird, Gwibber, Transmission, Empathy, make use of the notification system created by Ubuntu. In GNOME 3, that sadly isn’t the case. A lot of work still needs to be done in integrating the applications with the notification system.

    Since I have a 8 mbps internet connection at home, installing the proprietary drivers for my NVIDIA GeForce 8600M GS graphics card and proprietary firmware for my Intel® PRO/Wireless 3945ABG wifi adapter was a breeze and went without any issues. I even tweaked GRUB’s resolution and enabled a cool bootsplash screen featuring the Joy theme.

    All these years of using my laptop, a couple of times, I did try to move out of Ubuntu, but there was always something that made me come back to Ubuntu in no time. But this time I am having a good experience with Debian Wheezy and GNOME 3 and it’s highly unlikely I will come back to Ubuntu any time soon. Ciao Ubuntu, without doubt you were very good and worked without issues for me ever since I started with Feisty Fawn and I am very happy about that. But now it is time to go.

    You have root? I have Debian!

    P.S. It’s been a while since I wrote a blog post and to insert this image, I was struggling for minutes together to find the button to do it. It was on the top of the editor and not as a button in the toolbar as I was expecting 🙂

    October 4, 2012
  • Welcome Ubuntu Oneiric Ocelot!

    Ubuntu Oneiric Ocelot is out! I have used Ubuntu on my laptop since the 7.10 Gutsy Gibbon release and every release would get me excited like a kid would on seeing new toys. I would try to do a dist-upgrade or download the ISO image to install it using my USB drive. Ubuntu repositories would be under heavy load and I would egging my package manager to download all the packages faster and faster and it would be well past midnight by the time when I go to bod after I am done with the installation and setup.

    This time things are way better. I already have Ubuntu Oneiric installed on my laptop! 🙂 I am spared of the downloads and the midnight tussles that I had to go through so that my laptop will have a spanking new Ubuntu to use the next day. But all this luxury didn’t come without pain.

    Oneiric Ocelot


    When I installed Oneiric Ocelot beta 1 release, the Unity port to Gnome 3 was totally broken and unusable. Most actions done on the desktop would cause Unity, Compiz or some GNOME 3 component to crash. There was also a serious issue of focus change between open windows and the desktop wherein switching between windows was not possible at all.  All I could do with the desktop was to report bugs. There started a marathon of non-stop bug reports and daily updates which were often more than 50 MB in size. I cursed Ubuntu like anything on social networks and had lengthy arguments with my friends over there. I reported more than 50 bugs most of which were centered on Unity and Compiz. There was a provision to install a Classic GNOME fallback mode, but it was more of an emulation layer on top of GNOME 3.x and not a full-fledge GNOME 2.x environment. When I decided to try GNOME shell, I found that it had too many rough edges and wasn’t integrated properly with Ubuntu.

    All this led to a stage where I almost decided to quit Ubuntu for good. But wait, did I have an alternative distro that I could switch to? Nope. Debian and Fedora were the only candidates that I was considering. Being used to the Debian world for so long, Fedora didn’t excite me enough. Debian? Debian would be good, but a lot of effort would be required to get it working with my nVidia graphics card by installing the proprietary drivers. Nouveau is a promising project that aims to provide libre drivers for nVidia, but isn’t fully mature yet and has its share of issues. Also with Debian stable, I would be lagging behind the latest releases of most of the software. I could install “testing” or “sid” if I wanted to live on the bleeding edge, but the experience with Ubuntu Oneiric Ocelot beta left me hesitant to proceed in that direction though Debian would be way more stable. So I just decided to wait a bit for the bugs to get fixed and things to improve. Things did improve gradually with the daily updates which some times introduced new bugs. That the Ubuntu team was working in full swing towards a release free of critical and usability bugs was obviously visible while observing the bug transitions and updates. About 2-3 days back, the updates stopped as expected and Oneiric Ocelot was ready to gallop towards today’s grand release. And with today’s release, Ubuntu has succeeded in bringing a very good release that sets an exciting road-map for the upcoming LTS release aptly named “Precise Pangolin” due for release next April. My hearty congratulations to all those who made awesome release possible, contributing in myriad ways.

    Will I try Precise Pangolin in its beta stage? Of course I will 🙂

    October 13, 2011

The Midnight Sun

I think therefore I am

  • Blog
  • About
  • FAQs
  • Authors
  • Events
  • Shop
  • Patterns
  • Themes

Twenty Twenty-Five

Designed with WordPress