The Midnight Sun

Year: 2023

  • Automatically delete the trailing whitespace on save in emacs while excluding the trailing newlines

    I use emacs as my editor and have it configured to delete all trailing whitespace in a file, including any trailing newlines at the end, before saving it. The configuration snippet that I have in my emacs configuration file to do this is

    (add-hook 'before-save-hook 'delete-trailing-whitespace)

    While this is very convenient and works as expected, it becomes a hindrance in specific cases – the Jinja2 templating language deletes a single trailing newline, thereby leaving the rendered templates without a newline at the end.

    One way to work around this behaviour is to add 2 trailing newlines in the jinja2 template files. But unfortunately, due to my emacs configuration that deletes all trailing whitespace, this doesn’t work. So I started reading the documentation for the delete-trailing-whitespace function and found out about the delete-trailing-newlines variable (default: t). This variable controls whether the trailing newline characters at the end of a file are deleted or not. So I wanted to try overriding the delete-trailing-newlines variable to be false in jinja2-mode, that I use for editing Jinja2 templates.

    With some help from the excellent folks in the #emacs IRC channel on Libera Chat, I was able to come up with the following configuration, that works as expected.

    (use-package jinja2-mode                                                                     
      :pin nongnu                                                                                
      :hook                                                                                      
      (jinja2-mode . (lambda ()                                                                  
                       (setq-local delete-trailing-lines nil)))                                  
      :mode "\\.j2\\'")
    

    Note that I use the excellent use-package macro to install the jinja2-mode and configure it appropriately. If you don’t use use-package, this can be done using the add-hook function.
    June 12, 2023
  • Turbocharge your Firefox containers using the Containerise add-on

    The Firefox multi-account container add-on is very useful for creating isolated containers for various sites and groups of sites. I use it every day and love it. The add-on provides a simple way to map certain domains to always open in specific containers. This is useful, but it doesn’t work well when sites use the same domain for multiple web applications that you want to isolate. Google, for example, does this and hosts Google search and Google maps on the same domain, and the add-on will open both of them in the same container, without a way to separate them.

    Here’s where the Containerise add-on comes handy. It supports mapping URLs to specific containers using glob and regex patterns. Using this, I can add the following glob pattern for my Google container in the ‘Containerise’ add-on to isolate all Google searches to the Google container.

    !https://www.google.com/search*

    This is useful to prevent my Google searches from being directly linked to my Google account logged in another container or outside the containers.

    May 24, 2023
  • Replacing the Netspeed Widget on Kubuntu 22.04 and newer

    I have been using the Netspeed widget on my KDE Plasma installations for a long time to display the network download and upload speed in the Plasma panel. When I upgraded to Kubuntu 22.04 a few months ago, I found that it stopped working. After doing some research, I found that the KSysGuard package that the widget depends on has been removed from the Debian and Ubuntu repositories as it is unmaintained (Debian bug).

    Thanks to a useful suggestion on Reddit, I was able to recreate the functionality of this widget using the System Monitor Sensor widget. Here is what I did to achieve it.

    • Add the System Monitor Sensor widget to the panel.
    • Right-click the widget and click on the Configure System Monitor Sensor option in the menu
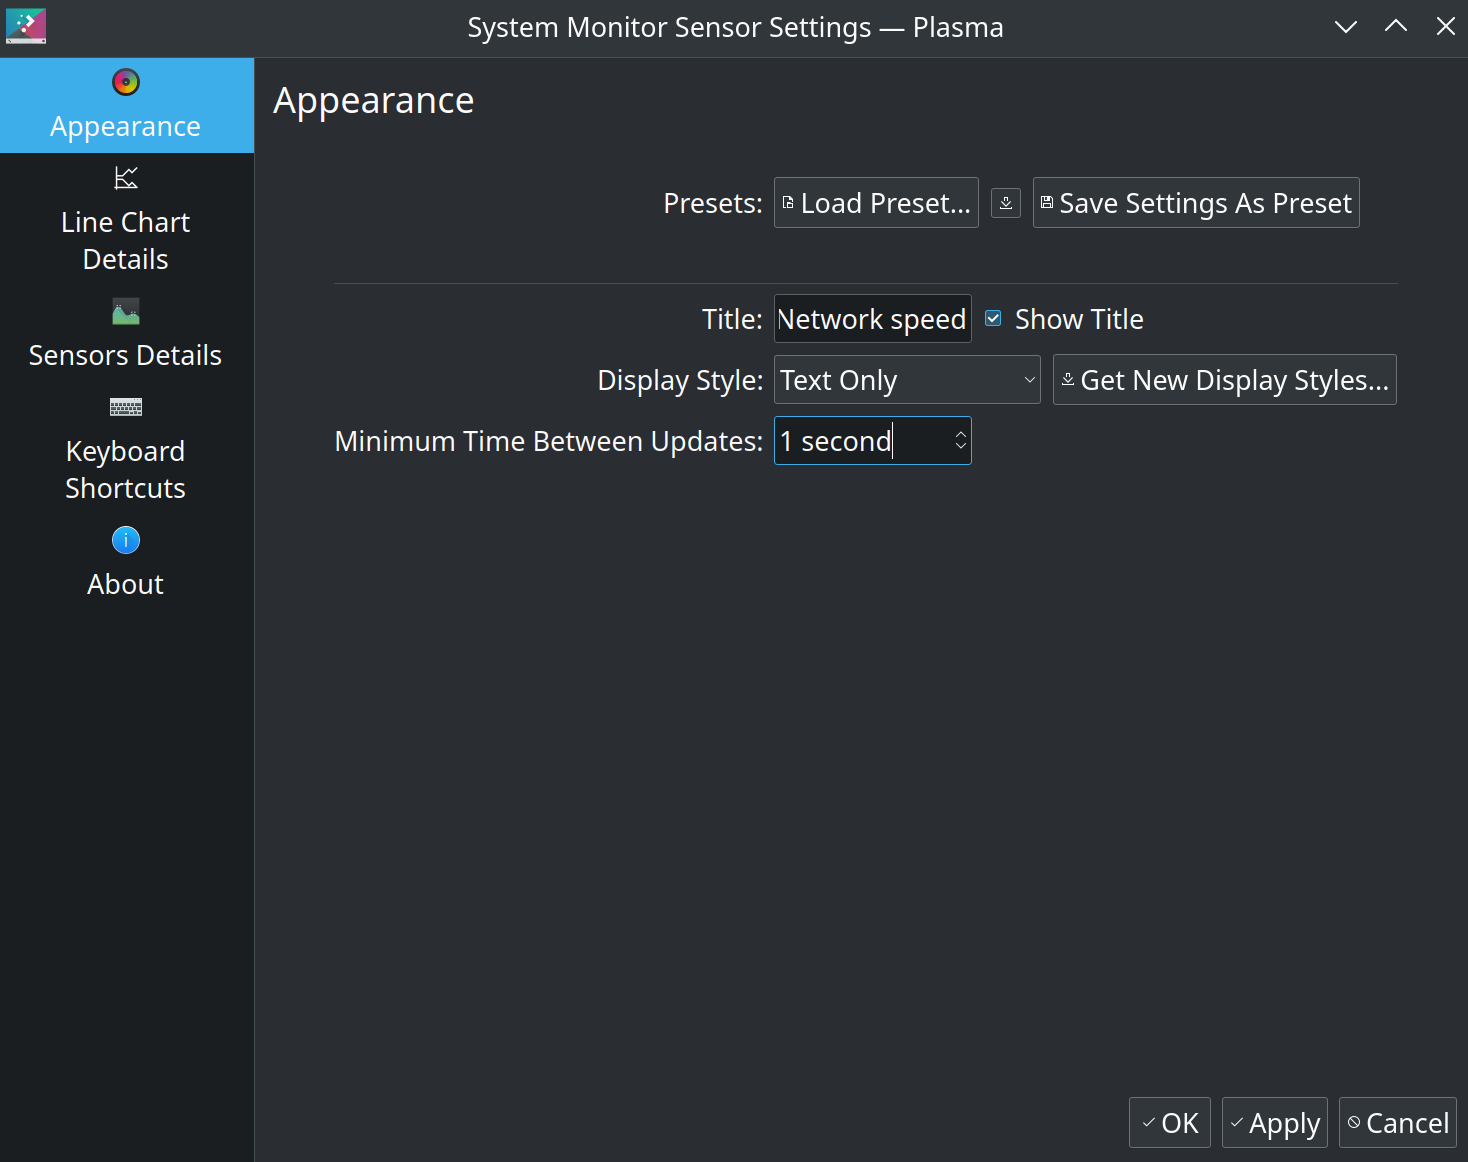
    • In the Appearance tab, load the Network speed preset, set the Display style to Text Only and set the Minimum Time Between Updates to 1 second. Apply the changes before proceeding to the next step.System Monitor Sensor widget appearance tab settings
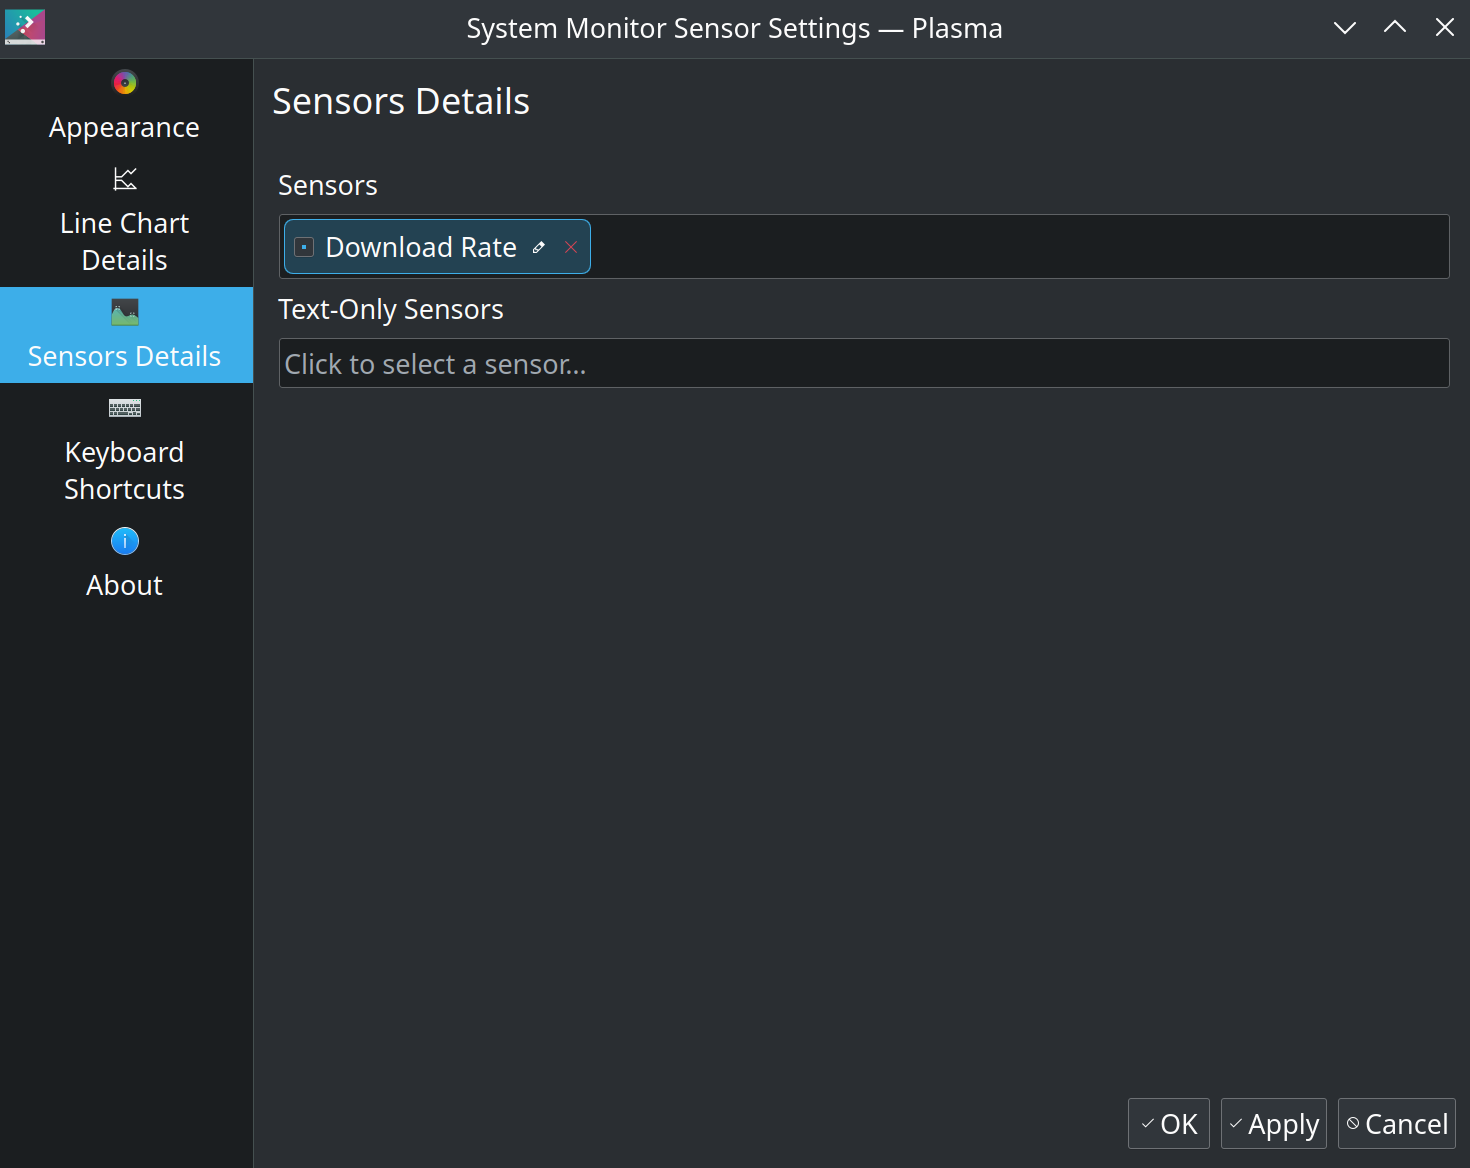
    • Open the Sensors Details tab and in the Text Only Sensors field, search for the Download Rate sensor. I chose the Download Rate (B/s) version. There is also a Download Rate (b/s) sensor, if you prefer that.System Monitor Sensor widget Sensors Details tab
    • Click on the small pencil icon edit button just after the name of the widget, Download Rate, to edit it. Specify the down arrow symbol, ↓, as the name. Apply the changes.
    • Now you have a widget that shows the current download speed on the panel, updated once every second.
    • Add another System Monitor Sensor widget to the panel and configure it to display the Upload Rate by following the steps above, tweaked for displaying the upload rate.
    • The result of doing these steps should look like what is shown in the screenshot below.Download and upload speed widgets on the Plasma panel

    With this, I have a good replacement for the NetSpeed Widget on my Kubuntu install.

    January 19, 2023
  • Ubuntu 22.04 desktop installation guide btrfs-luks full disk encryption including /boot

    I am a big fan of Willi Mutschler‘s btrfs-luks full disk encryption installation guides on his site, https://mutschler.dev, and have used them for installing Manjaro and Ubuntu 20.04 and newer versions. Recently, I set up Kubuntu 22.04 full disk encryption by following the same guide and noticed a couple of changes that had to be done to get it working. So I am documenting those here till he writes a new guide for Ubuntu 22.04. 🙂

    In the step 3 of his excellent guide, the optimized mount options for SSD and NVMe drives are listed. The space_cache option mentioned in that section no longer works on Ubuntu 22.04 because the option has been renamed in the newer versions of the Linux kernel. So one has to specify the option as space_cache=v2. Otherwise, the Ubiquity installer will crash, and the installation will fail.

    Also, in the Install the EFI bootloader section, it is a good idea to use the HWE Linux kernel package names corresponding to 22.04 instead of 20.04 since the packages containing the old LTS version in their name are ‘dummy transitional packages’. So the corresponding command can to be updated to

    apt install -y --reinstall grub-efi-amd64-signed linux-generic linux-headers-generic linux-generic-hwe-22.04 linux-headers-generic-hwe-22.04

    At the time of writing this post, the HWE package installs the same kernel version as the one that shipped with Ubuntu 22.04 since there isn’t a newer kernel released yet – these are usually backported from newer LTS versions.

    With these minor changes, it should be possible to follow the steps in that documentation to set up full disk encryption with btrfs and luks on Ubuntu 22.04.

    As a bonus, I have used the same guide for installing Kubuntu 20.04, 21.10 and 22.04, with appropriate substitutions, wherever needed.

    I have usually skipped the last section in this guide, Install Timeshift, timeshift-autosnap-apt and grub-btrfs, in favour of using my tools of choice to do the same – Snapper and snapper-gui, both of which are available in the official Ubuntu repositories. I will write a blog post about it in the future. 🤞

    January 18, 2023

The Midnight Sun

I think therefore I am

  • Blog
  • About
  • FAQs
  • Authors
  • Events
  • Shop
  • Patterns
  • Themes

Twenty Twenty-Five

Designed with WordPress